How To List Your Property on Vrbo: A Detailed Guide
Jun 23 2025
Jessica Hopkins
Get tips on how to use Hostfully to optimize your vacation rental business and make more profit.
Share
What’s in this article?
Vrbo stands out from other listing platforms by focusing on guests seeking entire homes rather the shared spaces on sites like Airbnb. It’s the go-to choice for families, groups, and solo travelers who value privacy.
Many hosts say this feature makes Vrbo guests more respectful and low-maintenance than the average traveler, furthering the platform’s appeal.
If you’re already on Airbnb and booking.com, you probably know how to create a compelling listing. But Vrbo has some nuances and quirks that take getting used to. Successfully listing on the platform involves navigating unique requirements, extra steps, and different metrics.
Our guide is here to help. We’ll walk you through each step of the Vrbo listing process and offer top tips to help your property stand out.
Why list your property on Vrbo?
If you are already listing properties on Airbnb and booking.com, adding another platform might seem like extra work. But if your property is suitable for Vrbo and you aren’t on there, you could be missing out on potential bookings from your ideal guests.
Here are just some of the benefits of listing on Vrbo:
Greater reach: Listing on Vrbo puts your property in front of around 18 million travelers worldwide. This wider exposure boosts your chances of bookings and helps your rental stand out in a competitive market.
Niche audiences: Vrbo attracts vacationers looking specifically for whole-home rentals, often families or groups. They may not be on the current channels you use.
More trustworthy guests: Vrbo uses strict verification and review processes to attract serious, reliable guests. This lowers the risk of cancellations and property damage, making hosting easier and more secure.
Simplified management: Vrbo connects with leading software to share data and streamline property management. For example, you can integrate Hostfully and Vrbo to sync listings and reservations with your direct booking site and other channels.
Some businesses will find Vrbo suits them better than others. Hosts Chelsea & Bobby Vaughn of Evergreen Dorrington are a great case in point: “Vrbo felt like a natural fit because our properties cater to families looking for longer mountain getaways – exactly their core demographic. Vrbo’s platform emphasizes the “vacation rental” experience over the more transient “accommodation” feel of other platforms, which aligned with our business model.”
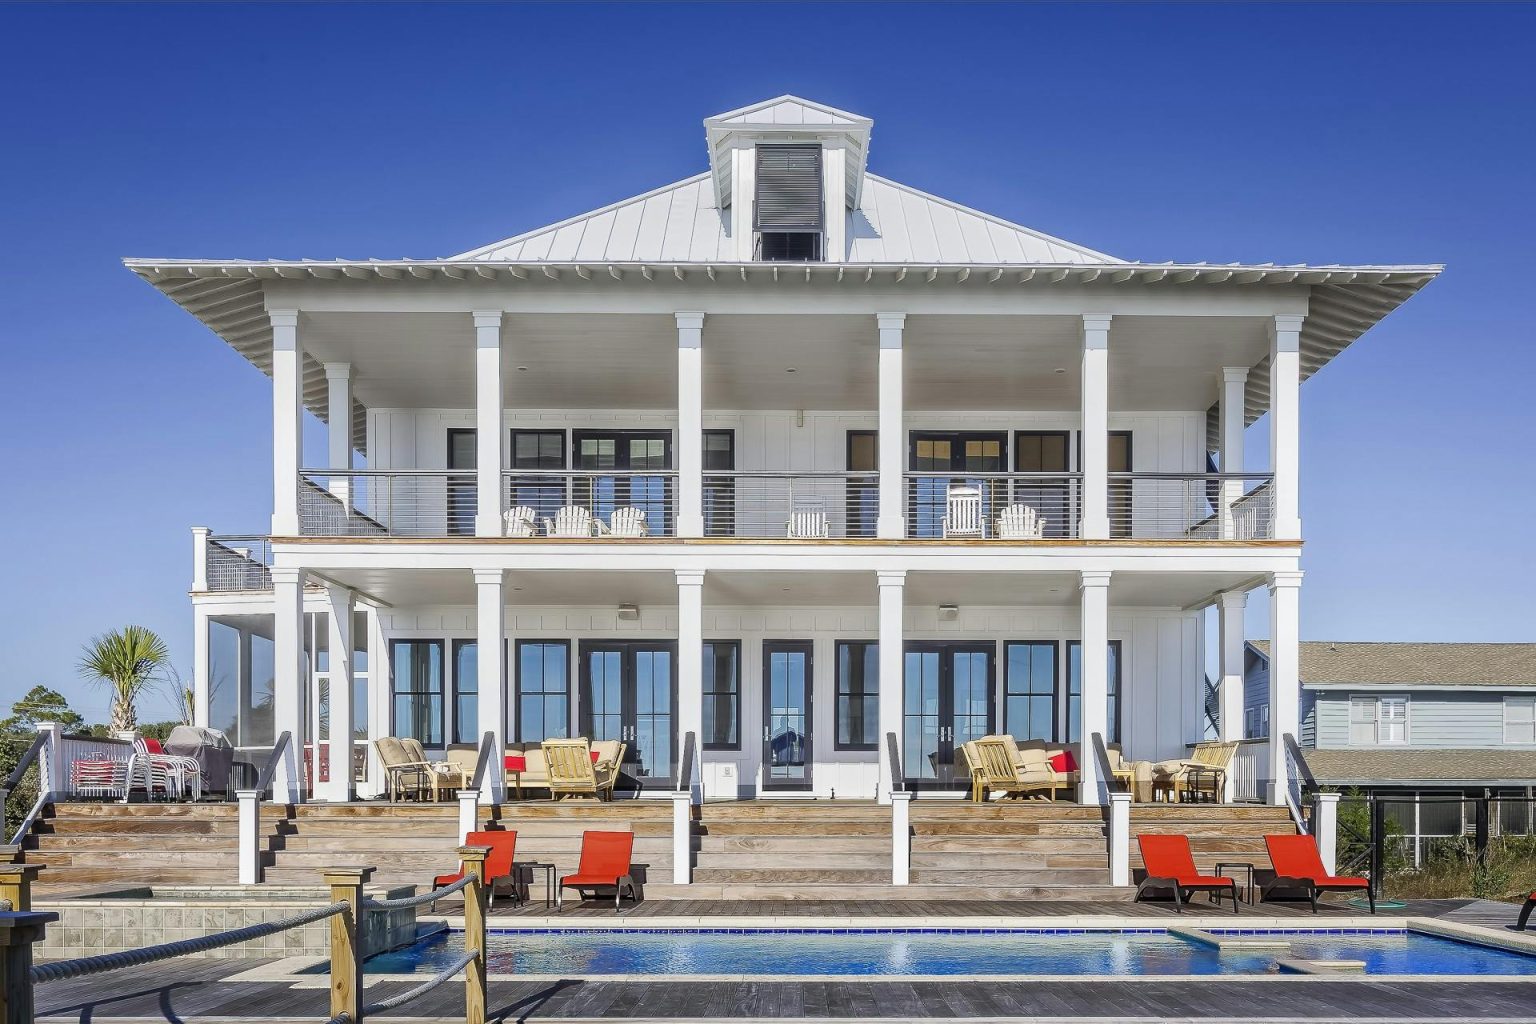
While Vrbo caters to a wide range of guests, group and family-oriented businesses are likely to get the most out of the platform. Source
What does it cost to create a Vrbo listing?
Vrbo charges you around 8% per booking rather than an upfront fee. This covers the basic costs of running the site, such as listing management, payment processing, and customer service. All Vrbo fees are based on the booking total at checkout minus refundable amounts like the security deposit.
These charges vary between locations. For example, Australia, New Zealand, and Japan pay the 5% booking fee plus the local goods and services tax.
Vrbo previously offered an annual subscription option, but this is no longer available to new hosts. Only current subscribers can renew to access this plan.
Airbnb hosts listing on Vrbo will find there are several differences in the two platforms’ fee systems: Notably, on Vrbo, you don’t have the option to split the booking fee with guests. While the amount depends on your location and business, Vrbo fees tend to be lower on average than Airbnb fees.
What you need before listing on Vrbo
Forget clever marketing strategies for now. Before you can start listing, you must ensure you can meet Vrbo host requirements and prepare all the paperwork in advance.
Here’s all the information and documentation you need:
Short-term rental permit: Vrbo works with local authorities to ensure hosts have the necessary licensing. They may require you to upload this before they approve and activate each property listing.
Proof of property ownership: You must confirm you own the property and you’re legally allowed to list it and use it as a short-term rental. Alternatively, you may be able to send Vrbo the owner’s written approval.
Contact information: You must add your contact information so guests can reach you in case of an emergency. As well as being Vrbo policy, it’s often a legal requirement for vacation rental businesses.
High-quality photos: Vrbo requires you to add a minimum of six high-resolution photos. They must include a wide shot of the exterior of the property and all the guest rooms and bathrooms.
Prices: While you may change your pricing or offer discounts when you please, Vrbo requires you to set a base nightly rate for each rental.
Tax information: Vrbo collects your taxpayer details to comply with local laws. The platform is often required to remit taxes from guests on the property owner or operator’s behalf.
Step-by-step guide to listing on Vrbo
Once you have all the details ready, follow these four simple steps to get your Vrbo account up and running.
Step 1: Create a Vrbo owner account
Go to the Vrbo website and create an account. You have the option to use the Vrbo owner app, but we find the website is generally easier for the setup.
Be sure to use an email address with an inbox free of clutter to stay on top of guest inquiries and booking updates. Alternatively, integrate with a PMS like Hostfully to use their unified inbox to manage communication.
Step 2: Add a new listing
In the navigation menu, select List your property. You have the opportunity to add your property’s location and number of bedrooms to estimate its earning potential.
Step 3: Complete your listing setup
Go through the checklist and add the following details and documents when requested:
Your name, email, and phone number
The property’s address
Details about rooms and amenities
Six photos
Tax information
The base nightly rate
The cancellation policy
Check-in and check-out times
While Vrbo sets minimum requirements, aim to include as much information as possible from the start. Include details like your house rules, unique features, and nearby tourist attractions.
Step 4: Review and go live
Check your details and confirm. While you can edit settings later, it pays to get this right from the start. Potential guests will see your rental property as soon as it goes live and start forming their first impressions.
Vrbo takes a day or two to review your listing. They notify you once they’ve done this so you can be on the lookout for reservations.
Tips to optimize your Vrbo listing for maximum bookings
Success on Vrbo is all about getting those precious first positive reviews and ranking high on the algorithm. Here’s how to create a listing that gets bookings so you can attract potential guests:
Focus on your unique selling point
Vrbo has hundreds of properties in many popular areas. Identifying your unique features and focusing on them in your listing can help you stand out in this crowded market.
For example, the Vaughns say highlighting family-focused amenities was a game-changer. “We made sure our listing photos prominently featured unique family elements rather than just pretty room shots. The impact was significant – VRBO now consistently represents about 30% of our total bookings, performing equally well alongside our other channels.”
Think outside the box here. Many properties have swimming pools and hot tubs or a great view of a nearby tourist attraction. Perhaps yours is the only one on flat ground with no stairs, making it ideal for guests with pushchairs or mobility issues. Or maybe your property has a yard with a high fence so children and pets can’t escape.
Set optimal rates from the start
When setting your initial rates, go slightly below competitors in your local area. This helps attract bookings and generate positive feedback, as you don’t have ratings or reviews to rely on yet. Don’t undervalue too much, just enough to catch potential guests’ attention.
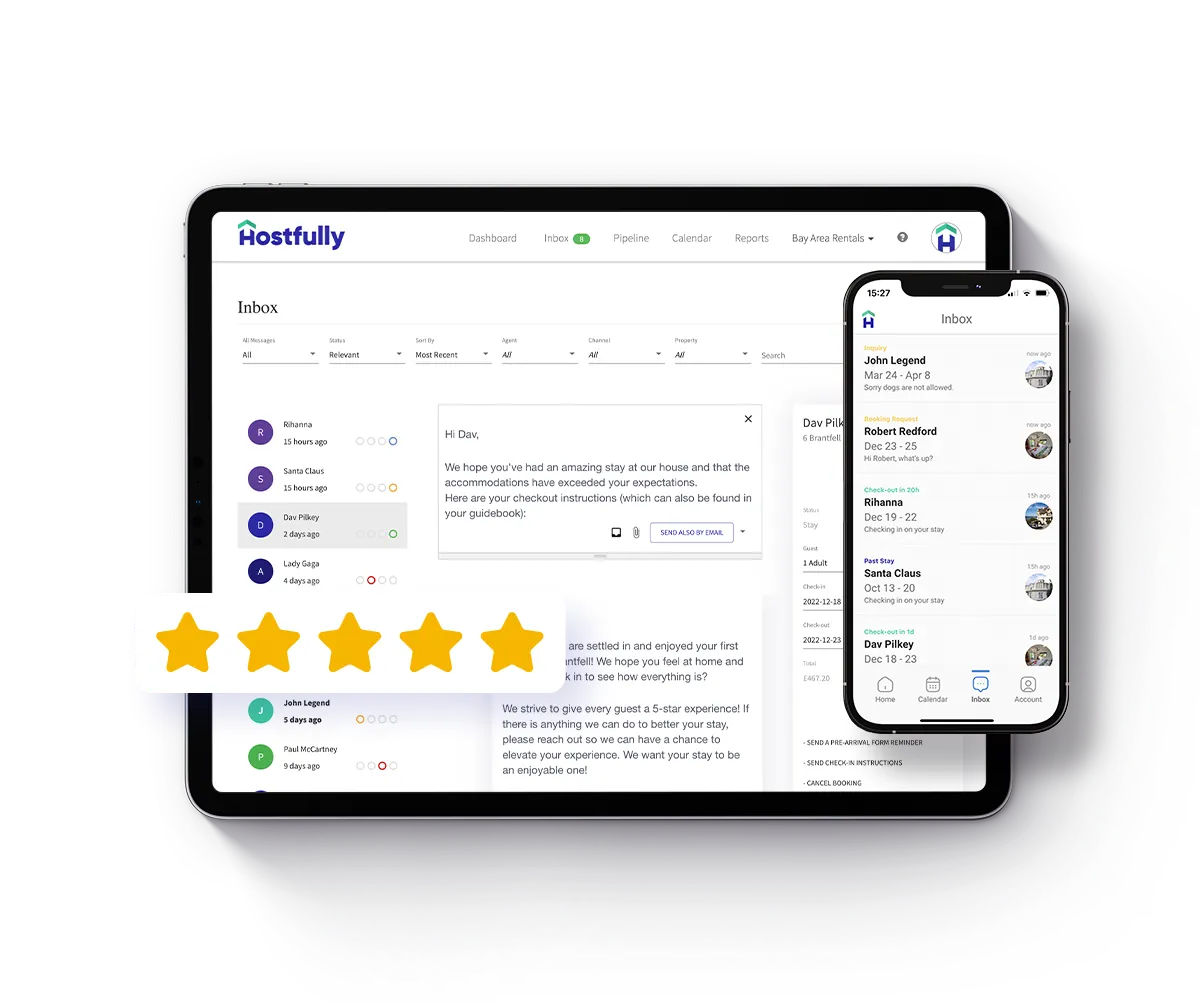
Getting those early reviews is crucial. Remind guests to leave feedback by sending them a message a couple of days after they leave. Hostfully’s unified inbox makes this easier by letting you create templates, automatically fill fields with guest details, and schedule them for a set time after check-out.
Hostfully PMS syncs with Vrbo so you can send automated messages to guests through the platform.
Don’t keep setting rates manually after you’ve generated enough reviews. Integrate your Vrbo and PMS with a dynamic pricing tool to analyze market trends and competitor data and automatically find the best rate for you. This ensures you always get guests’ attention without pricing yourself too low.
To learn more, check out Hostfully’s range of dynamic pricing integrations.
Understand and cater to your key demographic
Different generations have different priorities. Understanding what your audience wants and reflecting this in your Vrbo listing can help you get more bookings.
Gen Z: Recent surveys show that this generation prioritizes flexibility and unique experiences over luxury. Aim to do something wholly original to beat the competition, like unusual sleeping arrangements or themed decor.
Millennials: While this generation has a lot in common with Gen Z, they’re more likely to have hectic jobs. Include shots of potential working spaces and provide details about your WiFi in the description.
Gen X: The next generation up is often parents seeking comfort and convenience. Ensure you have a detailed property description and highlight your kid-friendly amenities for all ages.
Baby Boomers: Research shows the older generations prefer familiarity and are less comfortable using AI and automation. Avoid getting too experimental with your photography and tone of voice, and show them how to contact you directly for extra assistance.
A PMS like Hostfully can give you the demographic data you need. Whenever you accept a booking, our data and analytics features automatically capture and track guest details when they book with you.
If you use multiple channels, you may notice a pattern. As the Vaughns say, “Our target demographic is primarily Bay Area families with children – typically parents in their 30s and 40s. What’s interesting is that across all our booking channels (VRBO, Airbnb, and direct), the guest profile remains remarkably similar.”
Use a channel manager to sync listings
A channel manager like Hostfully syncs your listings across sites. It shares key information like your property information, pricing, and availability automatically, so you don’t need to manually update details everywhere.
Syncing data like this saves you time setting up and updating listings. While you need to edit for originality to meet Vrbo requirements, it only takes a few steps to tweak the descriptions and details. Not only that, the software shares your calendar across all your platforms so you avoid double bookings and cancellations.
Even if you only use Vrbo for now, starting with a channel manager makes it easier to expand later. You can easily copy the data across to more listings as you grow your operations.
Plus, the Vaughns say that using a property management system (PMS) and channel manager as a go-between also makes managing Vrbo easier. “This integration approach has actually insulated us from many policy changes that might affect hosts managing manually. The key has been maintaining consistency across all our channels while letting the PMS handle the technical adaptations to platform changes.”
How to manage your Vrbo listing with Hostfully
Vrbo has unique and specific requirements that can easily trip up new hosts. By researching these in advance and preparing your listings accordingly, you can avoid common pitfalls and position yourself for early success.
PMS like Hostfully are designed to make handling Vrbo listings simpler. Our software centralizes booking management, so you don’t need to keep logging into different platforms. We also include a channel manager to share listing details across channels so you don’t need to keep starting from scratch.
Hostfully then automates key processes like guest communications, turnover, and booking management so you can focus on your Vrbo strategy. This lets you go beyond your first impression to deliver a 5-star guest experience and keep everyone coming back.
FAQs about Vrbo listings
How much does it cost to list on Vrbo?
It costs around 8% per booking to list on Vrbo. There’s an annual subscription for $699, but it’s only available to current subscribers.
How long does it take for my Vrbo listing to go live?
It takes around 24 to 48 hours for your Vrbo listing to go live after you submit it. Vrbo notifies you when it’s active and visible to potential guests.
Can I list on both Airbnb and Vrbo?
Yes, you can list the same property on Airbnb and Vrbo to maximize your reach. You can use a channel manager like Hostfully to sync information across platforms and avoid double bookings.
What documents are required for listing on Vrbo?
Vrbo generally requires the following to list on the platform:

 Syncing data like this saves you time setting up and updating listings. While you need to edit for originality to meet Vrbo requirements, it only takes a few steps to tweak the descriptions and details. Not only that, the software shares your calendar across all your platforms so you avoid double bookings and cancellations.
Even if you only use Vrbo for now, starting with a channel manager makes it easier to expand later. You can easily copy the data across to more listings as you grow your operations.
Plus, the Vaughns say that using a property management system (PMS) and channel manager as a go-between also makes managing Vrbo easier. “This integration approach has actually insulated us from many policy changes that might affect hosts managing manually. The key has been maintaining consistency across all our channels while letting the PMS handle the technical adaptations to platform changes.”
Syncing data like this saves you time setting up and updating listings. While you need to edit for originality to meet Vrbo requirements, it only takes a few steps to tweak the descriptions and details. Not only that, the software shares your calendar across all your platforms so you avoid double bookings and cancellations.
Even if you only use Vrbo for now, starting with a channel manager makes it easier to expand later. You can easily copy the data across to more listings as you grow your operations.
Plus, the Vaughns say that using a property management system (PMS) and channel manager as a go-between also makes managing Vrbo easier. “This integration approach has actually insulated us from many policy changes that might affect hosts managing manually. The key has been maintaining consistency across all our channels while letting the PMS handle the technical adaptations to platform changes.”


